Share this

Showing posts with label projects. Show all posts

Digital Princess Scrapbooking Paper

I'm trying to get back into scrapbooking...as if I have any more room on plate for something else.  I created these papers.  They are high resolution so they are fine for printing.  They are 12x12, but of course you could make them into any size square.  Feel free to pass this alone to your scrapbooking friends, but please just don't pass them off as your own creations.  Thanks and if you like them please comment below.  If you use any of them I would LOVE to see what you have created with them.  Thanks.

Click here to download the files.  You should click on the link to get the high res files, although It won't be long until I use up my free space up at Media Fire...are there any free sites out there or some at a better price than $9 bucks a month?  Since I am giving away my creations I can't really see what since it makes to have to pay to give stuff away.  I can't upload the original files on my blog b/c they're too big.


Read more...

Mickey Mouse Recipe Cards

I created these recipe cards and thought I would share them with my Disney friends :)  All I ask is that you please post a comment down below.  I hope you enjoy them!


Here is the link to download the cards.  I have 4 to a sheet and the cards are 4in. x 5in.  In case you have trouble downloading it, here is the image itself.

Read more...

DIY Rapunzel Wig

I loved Disney's new Rapunzel braid they have for sell, but didn't like the $20.00 price tag.  So I figured I would make one myself :) It was really quiet easy.  

Items needed: One thing of yarn, 2 yellow rubber bands, scissors, purple flowers, purple ribbon, and a hot glue gun. 

Me and two of my girls worked as a team.  I pulled the string out, Allison would cut it, and then when I walked back to grab another piece of string Macey would hand it to me (which prevented me to have to squat down each time, which was nice) 


It ended up being too long, and too thin, so I cut it in half and it was perfect.  Sorry I didn't measure how long the string was.  


I tied off one end and began to braid it.  At times I had a "Tangled" mess (pun intended)
but just go slow.

  
That's pretty much it.  I tied off the end then fit it around her head and tied it together.  Add some purple flowers and ribbon and there you go. 


O.K. so that's a crappy picture, but I liked how the Toy Story ball is in the background ;) 


Read more...

Make your own Toy Story ball

Macey only asked for 3 things last Christmas, a Toy Story bowl, Slinky Dog, and the famous Toy Story ball.  Well that was easy enough, right!  WRONG! 
The ONLY Toy Story ball I found was on ebay, and it was going for $40.00.  I wasn't going to spend that.  
I figured surly I could make one.  I did a search on how to go about painting on a rubber ball.

Here are the ingredients


First thing you need to do is, well find a yellow rubber ball.  I thought this was going to be the hardest part, especially seeing how I went shopping for it just a few days before Christmas Day.  Luck was on my side.  I found one at the very first place I stopped.  Academy Sports, or is it called Sports Academy?  I can never remember.  It cost me $5 bucks I think.  

You first must rub the entire ball with rubbing alcohol.  I found that sitting the ball on a cup worked pretty well. Then sprayed it with  a plastic primer. 


The ball I got had a design pattern on it which made it really easy to line the blue stripe around the ball. 


Then I made a star template on the computer and printed it out.  I wished I had saved it so I could post it, but I didn't.  

I outlined it with a red thin sharpie. 

After everything is painted and dried.  I coated it with a flat sealer.  I must have done about 5 or 6 coats with it drying between coats.  It's been several months since I made it.  It has held up pretty well, but even with the sealer the paint has chipped off some.  I plan on touching it up soon :) Oh, and mine has never been out doors.  I don't think it would last long outside.  But all in all it looks pretty darn good if I do say so myself. :) It sure beats paying $40.00 bucks for one.  

Here's the finished product. 


Read more...

Toy Story 3

Today we went to our mall to see Toy Story 3 in 3-D.   They had activities planned for the kids and a costume contest as well.  It wasn't until after midnight last night I decided I wanted Macey to wear a costume.  I actually thought it would be pretty easy since my 11 year old was Jesse for Halloween NINE years ago.  I had everything I needed except for decorating the shirt.  I thought to myself oh, this want take long.  And really it didn't except I did this while I should have been sleeping. I think it came out all right.  Thank heavens for hot glue guns :)   I was very happy that I didn't purchase a thing for this costume!  Except for the hat, but I bought earlier that day before I ever had a costume in my mind, and it was only $5. 

It amazes me how creative use start to be come at 2 am with less than 6 hrs. to create this all while missing sleep:)  I used the kids play money (coins) for the "buttons" and cut/glued paper circles out on top.  Some yellow felt, red ric rac, and hot glue I had a shirt.  The hat was pretty easy, I just thread yarn through the hat.  I had NO white ribbon so I used elastic for the white band. 


When I saw the adorable little Etch a Sketch and Mr. Potato Head I knew who had first and second place for the costume contest.  I thought Macey had a chance for 3rd but wasn't sure.  To my excitement she took 3rd place and received 2 free movie passes to see the movie :)  YEAH!! for her. 


She had fun playing the games.  


3 must have been the lucky number today :)  We saw Toy Story 3, Macey is 3, Macey won 3rd place, and in the theaters they gave out prizes if you could answer Toy Story trivia.  The question was how many eyes to the aliens have?  They picked Macey and she held up 3 fingers and won a 3 eyed alien.  


Today was a blast!  All worth a sleepless night! 

Read more...

Hoping my girls...

 ...Have a wonderful day at school and enjoy giving out there Valentines Cards :)


They had a blast making them!

valentine collage 1


Here's how you can make some.

Potato-Stamp Caterpillar
Materials 
  • Potato
  • Paring knife
  • cookie cutter
  • Acrylic paints 
  • Paper plates
  • 4- by 6-inch white index card
  • Paper towels
  • Markers
Instructions
  1. Create the heart stamp (a parent's job): choose a nice big potato and cut it in half. Use the cookie cutter to push in the potato, then carve away the surrounding potato with a paring knife.
  2. Spread a different color of paint on each paper plate
  3. Have your kids print a chain of hearts to make the caterpillar on the index cards. Blot the potato on a paper towel before switching colors.
  4. After the paint dries, use markers to add legs, a face, antennae, and a valentine message.


Facebook Peeps read this story on my blog at
www.awdreyh.blogspot.com

HeartAwdrey


Enter your email address:


Delivered by FeedBurner

Read more...

Christmas ornament project...Disney!

When I saw these ornaments, I knew what I wanted for my tree this year. Except when I figured up how much that would cost me to get everything I wanted, I had to rethink the whole idea.


It didn't take me long to decide...hey, I can me some. :)

I wasn't exactly sure how, but I went to the store with some ideas in my head and they worked out pretty good. I wanted to share this with all you Disney fans like me:)


I bought some of those foam sheets, you know, they are in the craft section right beside the felt sheets. Printed out a Mickey silhouette and then traced the ears out on the foam. Cut them out and then hot glued it to the ornament.


mickey collage 2
Add a bow and Mickey become Minnie! :)


Sitting there, I said to myself hmmm, I wonder if I could add some buttons to the red ornaments and make them look like his pants. Except something didn't look right. That's when my hubby suggested, YES that's right I said my hubby, I LOVE it when he gets involved. He said why don't you paint the top part black. BINGO! That worked. He even found the perfect cup size for me to trace the circle on. These are the cups you place in your bathroom. Matte finish ornaments works best and looks better. The shinny ones didn't take the coloring as well.


mickey collage 1


Now I have a whole army of Mickey/Minnie ornaments.

IMG_5327 copy

They look even better on a tree:)

IMG_5573 copy


IMG_5939 copy


P.S.

I'll have another post coming up soon on how to make your own custom bow!


HeartAwdrey


Enter your email address:


Delivered by FeedBurner

Read more...

Time Out


Last weekend I decided I would go yard saleing. I don't usually do yard sales, as a matter of fact I can't remember the last time I went to one. Anyway, it was fun. I went with a mission. I wanted to find something (didn't matter what) and take it home, clean it up and transform it into something really nice:) This is what I found at the yard sales.

IMG_1398

Yep, I got all of that for $6.50
I was very excited about the punch cups. No I don't use my punch bowl very often, but when I do, I have to use plastic cups b/c they only come with 8. So now I have 29 :)

I'll probably spray paint the baskets and use them in my kitchen. I might use the small one to hold my favorite recipes...not sure.

That long piece will have to have some work to it, but for what I have in mind I don't think it will take much.

The chair, ahhhhh the chair. As soon as I saw it I was excited! I knew I wanted it for Macey. I have been trying out the whole time out thing with her, and I have been wanting a designated spot for it. I thought this chair was perfect for that.

After the yard sales I went to Goodwill. Another place I haven't hardly been to, but think I will visit more frequently. I saw soooo much furniture that had some real potential, but I didn't have much cash to play so I stuck to the little things.
Here is what I got there.

IMG_1399

I plan on using those two shelves with that other shelf on the other photo. The frames will be cleaned up and spray painted. The bowl is for the kitchen. I just couldn't pass up the deviled eggs tray. I don't know if my Maw Maw had one just like it or what, but for what ever reason it reminds me of her.

Oh, and that little black thing in the top right hand corner...I was so excited about that. It is a Polaroid camera, not an antique. I have always wanted a Polaroid. Don't ask me why. I mean, I love my Canon dearly, don't get me wrong;) They had $4.00 marked on it, and I wasn't sure that it even worked. The lady that worked there said she could give it to me for $2.00. I was so happy! That is until I got home and started searching and realized that they no longer make Polaroid film anymore, Hahahaha, right? Why wouldn't I have known that? Oh well so now I have a Polaroid camera that I'll sell for $2.00 is anyone wants it. GRIN

Let's get to the point for this post in the first place. I have been working on decluttering my house, working on projects and trying to get stuff organized (yeah right) I was anxious to get started on that chair I found. I did some research on time out chairs. I found this picture that I really like doing a Google search.


So I re-created the time out part in my software, printed it out and then used a craft knife to cut it out and make a stencil out of it. Here is what I came up with. Feel free to take the image if you want to make one too.
Time Out

After cleaning the chair real good, I spray painted it and then applied the time out. Here is what I came up with.

IMG_1490

IMG_1491 copy

I think it came out pretty good. I kind hate that it's a time out chair now, it's almost too cute to be used for punishment:(

I have tons more ideas up my sleeve, I just don't know when I'll get them all finished. I have big plans for the living room if I can ever get the rest of what I started done.


HeartAwdrey

Read more...

Silhouette Drawings Tutorial


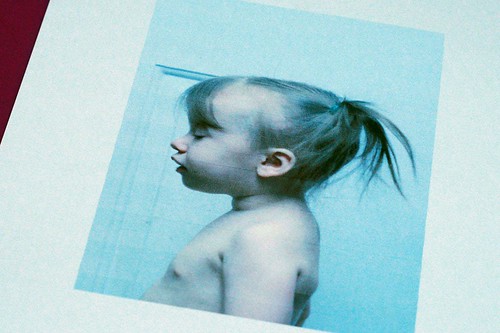
Do you want to know the hard way, or the easy way? I'll start with the hard way since that is how I first did it, and took pics for every step. :) The first thing is to take a profile pic. All you need is a blank background. If you are doing more than one, make sure you are the same distance apart from each subject. About 4 feet away is what I did. Then print out the pic. You can use fast draft to save on ink, but I would use card stock paper.

Macey's profil.
Profile

I cropped each photo to a 5x7 crop so they would all be the same size. I think if I was to do this again I will use an 8x10 b/c the actual silhouette is smaller than a 5x7.


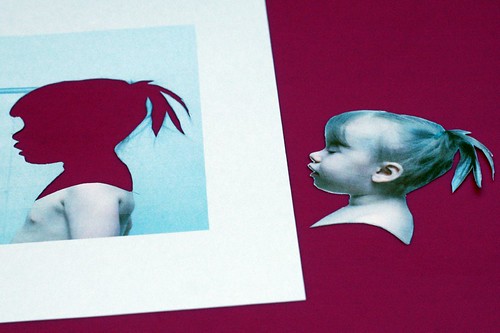
Cut out

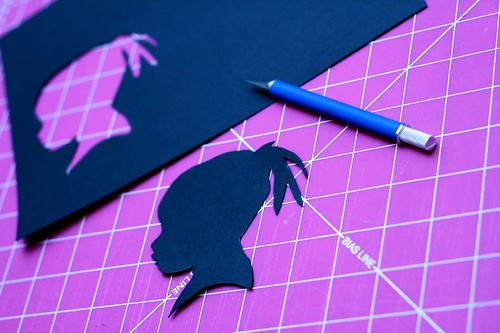
Now just cut around the person with a craft knife.

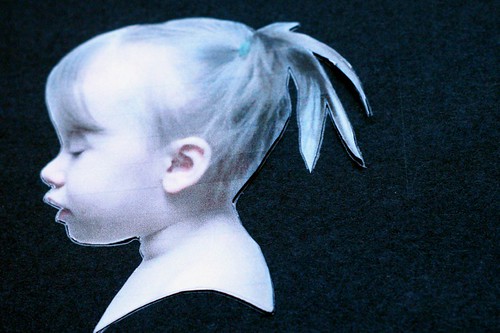
Trace

Trace the pic. onto black cardstock. If you want your finished silhouette to be facing the right, then trace it facing the left. This way you won't see any stray pencil lines and the cut is much cleaner on the opposite side. When this one is finished she will be facing the right side.

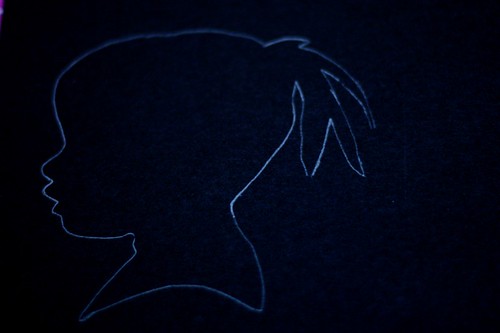
Trace

Cut out again

Cut out one more time. Pay close attention to details, especially around mouth and nose. Make sure things are rounded and not pointy.

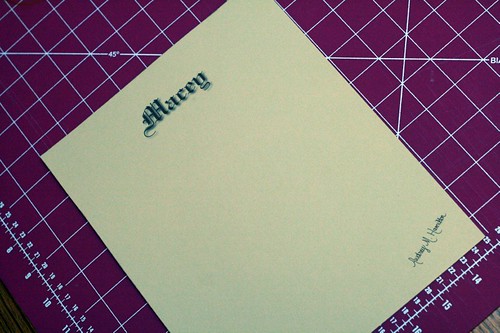
Paper

Choose a contrasting background. I used scrapbook paper and cut it to an 8x10. Then I printed their names on it and my signature.

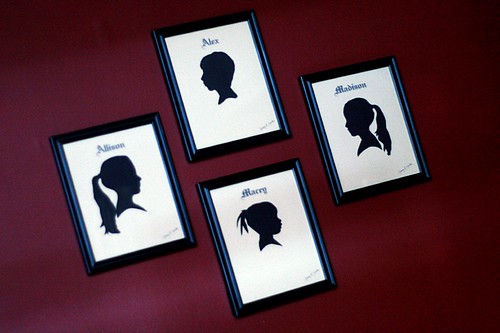
Finishe Product

I used a glue stick to apply the silhouette to the background and framed it. That's it. I think they look pretty good. Now do you want to know an easier way? This idea didn't even hit me until after I had done all 4 of them the other way. Oh, well.

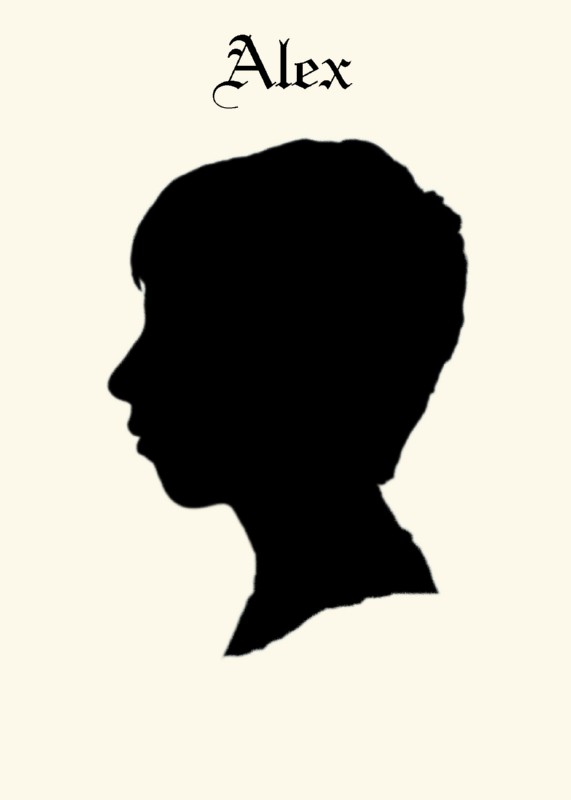
If you have photoshop or something similar. Then you can just take your profile pic. and use the lasso tool to trace around the person. Now I'm not great with the lasso tool and I didn't get the exact cut I was wanting, but with some practice, I bet it can be done a lot smoother.

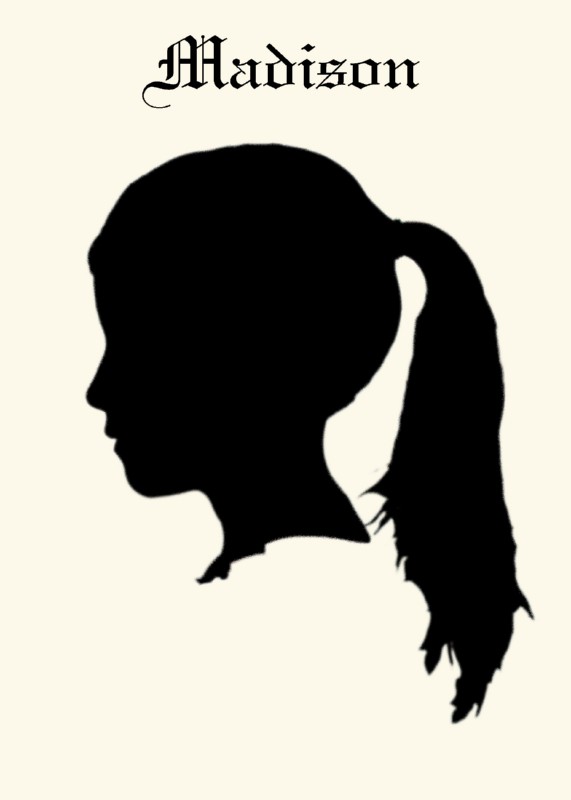
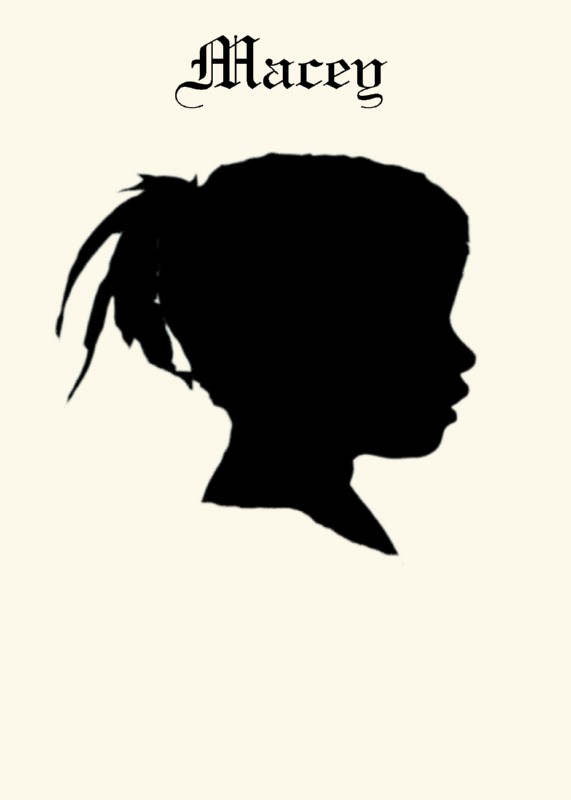
After you have traced the image, go up to edit and select fill layer with black. Then cut and paste onto a solid colored layer. That was much easier huh? I did a real quick one on the computer to just see if it can be done. Like I said there are some rough edges, but this could totally be done. Here are the ones I did on the pc.

Allison

Alex
Madison

Macey


Awdrey

Read more...
Share |
Related Posts with Thumbnails

♥ Grab my button


♥ Blog visits

♥ My photography blog

♥ My Tweets

    follow me on Twitter

      © Blogger template Shush by Ourblogtemplates.com 2009

    Back to TOP